Thursday, December 20, 2012

Christmas Finishes

I've been sewing away trying to get Christmas gifts finished up!  This year I'm giving three quilts: one for my grandma, one for my other grandma and grandpa, and one for my aunt.

Back in January or February, when I needed to take a break from studying, I worked on a batik quilt that used the Garden Trellis pattern from Jelly Roll Quilts by Pam & Nicky Lintott.  At the time, I was really into batik fabrics, right now my interest is waning...  Anyhow, the Asian Legacy roll-up seemed like a great choice - I loved the iris pattern in blue and purple.  The quilt ended up looking more brown than anything though.  Sigh.  So it was named "The Ugly Quilt" and it sat folded up in a drawer for about 6 months before I decided it was time to just get it done and get it out the door.  But I think that my grandparents will really like it, so it all worked out in the end!

Completed top

I had originally planned to border it with either purple or aqua - I ended up somehow buying the wrong quantities of fabric and used the light blue and brown bamboo print instead.  That probably didn't help the earth-tone situation.

Yesterday when I got home, there was a little tiny bit of sun left, so I took the quilt outside for some pictures before spending the night trying to cram it into a box to wrap it up for Saturday!

Completed back.

So the wrong quantity of fabrics leads to a lot of creative piecing on the back!  I had to re-use all of the scraps that had been cut off during the piecing process.  I kind of like it.  It's funny how sometimes when you're just improv piecing a quilt back together, you don't think too much of it but when you're supposed to make an improv quilt, you just freeze up!

Close up

The quilting isn't very fancy - there just wasn't enough time!  It's just stitch in the ditch outlining the diamonds (it's pieced together as squares and the quilting kind of shifts your eye's view from the squares to the diamonds).

Always label your quilts!

Tuesday night was label night!  I haven't really done labels on most of my quilts so far and someday I want to make something fancy and have it printed at Spoonflower, but for now, scraps of fabric will do!  

Another close-up

While quilting this, I realized that white thread isn't as neutral as I always think it is!  White actually really really really stands out.  I'm not that worried about it, but a brown or gray probably would've been a better choice for quilting this.

Yes, the hammock is staying out all winter just in case there's an impromptu photo shoot!

This last picture is my favorite - it looks so tropical!  A batik quilt on a hammock.  Unfortunately, it was like 40 degrees out, not 80.  But hey, on the plus side, the days will be getting longer again soon!

If there's time before I leave for Christmas, I'll share my finished Swoon blocks!  All nine of them are just sitting on a chair, taunting me.  Next Christmas.  That gives me a year to decide if I want to keep it for me or give it as a gift :)

Oh, and I ordered myself a Christmas present - a half yard bundle of Architextures!  Unfortunately, 8 days later, USPS is still hoarding it at a sorting facility...

Melissa

Monday, December 17, 2012

It's a Rainbow!

I got the greatest mail today: a rainbow of fat eights from Lizzy House! I forgot I ordered it, what a nice surprise!!

Time to finish up my holiday sewing!

Melissa


Friday, December 7, 2012

Winner!

And the randomly-selected winner of the fat quarter bundle for Sew Mama Sew Giveaway Day is............. Breanna S!  I've e-mailed her and will be mailing her new fabric out as soon as possible!

Thank you all so much for entering -  I never imagined this would generate so many comments or so many new followers!  My posts are somewhat sporadic, but I hope you all enjoy reading them :)  Time to get back to sewing!

-Melissa

Tuesday, December 4, 2012

Flurrying!

First of all, I'd like to welcome all the new followers who found this blog through the SMS Giveaway Day!  There's still time to enter - see my Giveaway Day post to win some of my leftover Flurry fat quarters and two pirate-themed fat quarters!

I apologize for not responding to any of the comments - it's just been too overwhelming!  There are so many of you!  So many comments have made me smile or chuckle - thanks for brightening my day! 

Since my last post about my Swoon quilt, I've completed Blocks 4 through 7!  Things have been slow going lately - other priorities... but I'm getting back on track since we're only 3 weeks from Christmas.  I don't see this one being finished for this year.  But the fabric sure helps make it feel like Christmas is coming (since the weather hasn't yet - it was probably 65 degrees here today).  Of course, tomorrow morning I have to go out on a field job and it's supposed to be cold again.  Sigh.  Why isn't it sunny and warm when I spend my days outside?  Oh wait, it's December...

Anyhow, here are the latest 4 blocks!  Again, I need to work on my photography.  These are crappy iPhone pictures taken under fluorescent light in my kitchen.  Hopefully we get some sunlight this weekend while I'm home and maybe I can snap a few better pictures outside!

Swoon Block 7

I love the blocks with bright red on them.  So cheery!  Block 7 is one of my favorites - the birds match the accent fabric so nicely!

Swoon Block 6
I will be using the red fabric in Block 6 for the quilt binding and probably some accents on the quilt back.  I'm not crazy about it paired with the light green, but it's too late now.  And it's really not bad.  Good enough :)

Swoon Block 5
Block 5 got pretty complicated - there are TWO directional prints!  It turned out pretty well, but I had to rip out a lot of stitches.  Late night sewing with directional fabrics is never a good idea.  And I'm also not too crazy about how the pattern looks wonky at the seamlines.  At least with the more mono-chromatic directional prints, it blends in.  This one looks odd if you stand and look at it from an angle across the room!

Swoon Block 4
 I really like the lattice-y 8-pointed star print in Block 4! 

Tonight I cut the fabric for Block 8 - unfortunately, on what should have been my VERY LAST CUT, I accidentally cut 1/8 too short! So instead of a 3-1/2" square, I have a 3-1/2" x 3-3/8" square :/  I think instead of adding fabric and cutting back down, I might cheat my seams on either side instead.  Close enough?

Overall, I think this is going to look awesome when I finish it!  What do you think I should do for the back?  Obviously, I should have a pieced back of some kind (as always!), but should I just go with solid white to match the background of the front?  Or solid light gray (think Kona Ash... but something in a Bella Solid or Cotton Couture - something softer)?

Since Christmas is fast approaching, I think my new goal is to finish the quilt top next week sometime (Block 8 should be done tomorrow with Block 9 to finish hopefully on Saturday morning) and then just let things sit.  There's a batik quilt I basted last week (I put it together in late winter/early spring) and I'd like to finish it up to give as a Christmas gift!  Hopefully Swoon will feature some bad ass FMQ if I let it sit for next Christmas!

In other news, I signed up for the MQG's Madrona Road Challenge!  Our fabric has arrived and we're trying to decide what we want our challenge to be.  Super exciting! 

This is my WIP Wednesday post for the week - check out all the other pretty WIPs at Freshly Pieced!

-Melissa

Monday, December 3, 2012

Sew Mama Sew Giveaway Day

Thanks for stopping by for my very first giveaway ever!  Today's giveaway is a de-stash for me, so it's a little bit of a mish-mash.


I'm giving away a bundle of six lovely fat quarters!  Four of the fat quarters are from Moda's Flurry line by Kate Spain and the other two are from Out to Sea by Sarah Jane for Michael Miller!  The Flurry fat quarters are perfect for your holiday sewing projects!

How do you like that little thread in the background? 
Maybe I need photography classes...

All you have to do to enter is leave a comment below.  If you're looking for something to say, tell me what your favorite holiday fabric line is!  You don't have to be a follower to win, but followers get an additional entry (leave a separate comment letting me know).

The giveaway will close on December 7 at 8 p.m. EST and a random entry will be selected and announced on my blog.  You must leave a valid e-mail address (if you are commenting as a no-reply blogger).

Good luck and thanks for stopping by!  Head back to Sew Mama Sew to enter all the other giveaways!

-Melissa

PS: Don't forget to vote for your favorite entry in the Christmas Quilt Show! (I'm #59 with my Christmas Ribbons quilt!)

UPDATE: The giveaway is now closed. Congratulations to our winner, BreannaS!

Friday, November 30, 2012

Christmas Ribbons Finished!

At long last, Christmas Ribbons is all finished up!  I wish I could've taken better pictures, but it was dark when I left for work and dark when I got home... I took advantage of some afternoon sunlight in my office but it wasn't as nice as I would've liked!  I need to turn one of my office walls into a quilt hanging wall for photos :)

This post is my last-minute entry into the Christmas Quilt Show!  Stop by and take a look at all the other pretty Christmas quilts and enter yours if you have time!

All laid out on my office floor - the only place I got any natural light today...

The finished quilt measures 75" x 60" and it was made with one jelly roll and a little bit of print yardage from Basic Grey's Jovial (all my Christmas fabrics have been stashed away since last year!) and Kona Ash solid.

The Christmas Ribbons pattern is from the book Scrap Basket Surprises by Kim Brackett.

Just a little bit of piecing on the back!

The back is made with two different poinsettia prints - the main fabric was used on the border on the front of the quilt, and the black and red fabric was also used for the binding.  I love a pieced back to break up tiled look of the print - I think maybe I want to start using solids for backing.

Close up of the quilt top

I had considered placing all the ribbons randomly instead of making single-color diamonds.  I'm glad I kept them together, it gives the quilt a different look.  There's a couple on the one end that were the "odds and ends" ones since there wasn't necessarily an even amount of each color.

One of my favorite parts of the quilt

I didn't realize these three like patterns came together at a point until after I'd sewn it together.  I tried to keep things spaced out pretty well, but this one slipped past.  It ended up being one of my favorite parts of the quilt!

Back of the quilt

The quilting is difficult to see, but I quilted around the "ribbons" in the quilt - a diamond in the middle and then a lot of 45-degree angled stitch in the ditch.  I keep thinking I want to try some of the patterns from Angela Walters' book that I recently purchased, but I'm afraid of ruining it since I don't have much practice.  And it's going to be a Christmas gift so I don't have much time to practice!  So it will stay as-is :)

Thanks for stopping by, I hope you like my take on Christmas Ribbons!  Don't forget to visit all the other beautiful quilts in the show!

-Melissa

Monday, November 19, 2012

Swoon Block 3

My Swoon blocks are moving along quickly!  This weekend I finished up Block 3 and cut all the background fabric for the rest of the blocks.

Swoon Block 3
The points aren't as sharp as in the first block, but it's still darn good for how mine usually turn out :)  I've been Best Pressing the hell out of the fabric before I start.  It helps!

My trusty Fiskars rotary cutter has been working for me for over five years now - it started springing back into the safety position while cutting.  While cutting for Block 4, I finally had enough and went to Joann for a new one.  I thought about springing for the Olfa brand one, but the one I got was much cheaper and will accept the spare blades I have...  I also picked up a copy of Free Motion Quilting with Angela Walters. You can expect to see some of her designs in my quilts soon!

Then after buying a new rotary cutter, it was time for a hiking adventure!  I went to Ohiopyle and checked out the Cascades.  It was a little chilly, there's still plowed snow piles that haven't melted yet, but it was sunny and warm enough.  The waterfalls are so pretty!  I could've sat and watched the water all afternoon.  Cucumber Falls was also nice.  There weren't too many people around, which made it even nicer!

The Cascades at Ohiopyle

Hopefully Block 4 will come together tonight!  And the binding is partially finished on Christmas Ribbons - you should be seeing the finished product soon.

-Melissa


Friday, November 16, 2012

Simply Awesome

My half yard bundle of Simply Color is here!!! Its going to be so difficult to do any more Christmas sewing now that this has arrived...

Wednesday, November 14, 2012

WIP Wednesday: Swooning and a Little FMQ

The Flurry of Swoon blocks has begun: two down... seven to go!  So far, I love it!  There have been a few headaches.  Especially with the directional prints.  The seam ripper has been my go-to tool for a few nights.  But I think I finally have the hang of it - and most of the mistakes are due to working too late at night.  Stop quilting BEFORE you get tired.  If you don't, you'll just end up tired and frustrated.

I shared my first block the other day.  It took me two evenings to finish my second block.  One night was cutting, the second night was piecing.  And ripping out stitches.  And piecing.

Swoon Block 2
 You can see that all the diamonds are aligned the same way - but the way the cutting instructions for the pattern are written, you can't get everything to line up properly (not an issue if you're using more flowing, floral type fabrics).  I found that out the hard way... but I managed to use the scraps to fix my problem!  Rather than use one big rectangle (with the diamonds going the wrong way), I sewed two smaller rectangles together to get the directional pattern to line up.  It's not the prettiest, but it's way prettier than having ONE rectangle going the wrong way.  It was so distracting to look at!

How to work with directional fabrics and the Swoon pattern:
two pieces oriented the correct way, sewn together.

So that's my Swoon Block 2.  It looks so pretty with Swoon Block 1!

Swoon Blocks 1 and 2 - so pretty!
I've got my other 14 fat quarters all paired up and ready to go - two of them aren't really in this photo...  But I'm really excited to see them all come together.  Especially now that I've got a grip on the whole directional fabric pattern thing!

Lovely Flurry fabrics all ready to Swoon!

I've been a little slow at work lately, so I wasted spent some time watching Leah Day FMQ pattern videos on YouTube.  I really liked one of her paisley patterns - I forget what exactly she called it.  But it looked fairly simple, so I thought I'd give it a shot.  First on paper, then with the sewing machine!
Paisley design - pen and paper

Paisley FMQ design
As you can see, it can use some work!  But I'm pretty happy with it for a first attempt.  I was planning to use it on the Swoon quilt, but I'm considering incorporating it into Christmas Ribbons.  More to come on that as things come together - I have been doing some more straight-line quilting on it, but it's going to require a little something else - too many straight lines!

I'm linking this post up to WIP Wednesday at Freshly Pieced - be sure to stop by and see some beautiful projects!

-Melissa

Monday, November 12, 2012

Swooning Over Flurry

Last fall, I snagged a fat quarter bundle of Flurry and stashed it away.  Christmas Ribbons really put me in the mood for some more Christmas quilting and the infamous Swoon quilt has been on my mind for quite a while now.

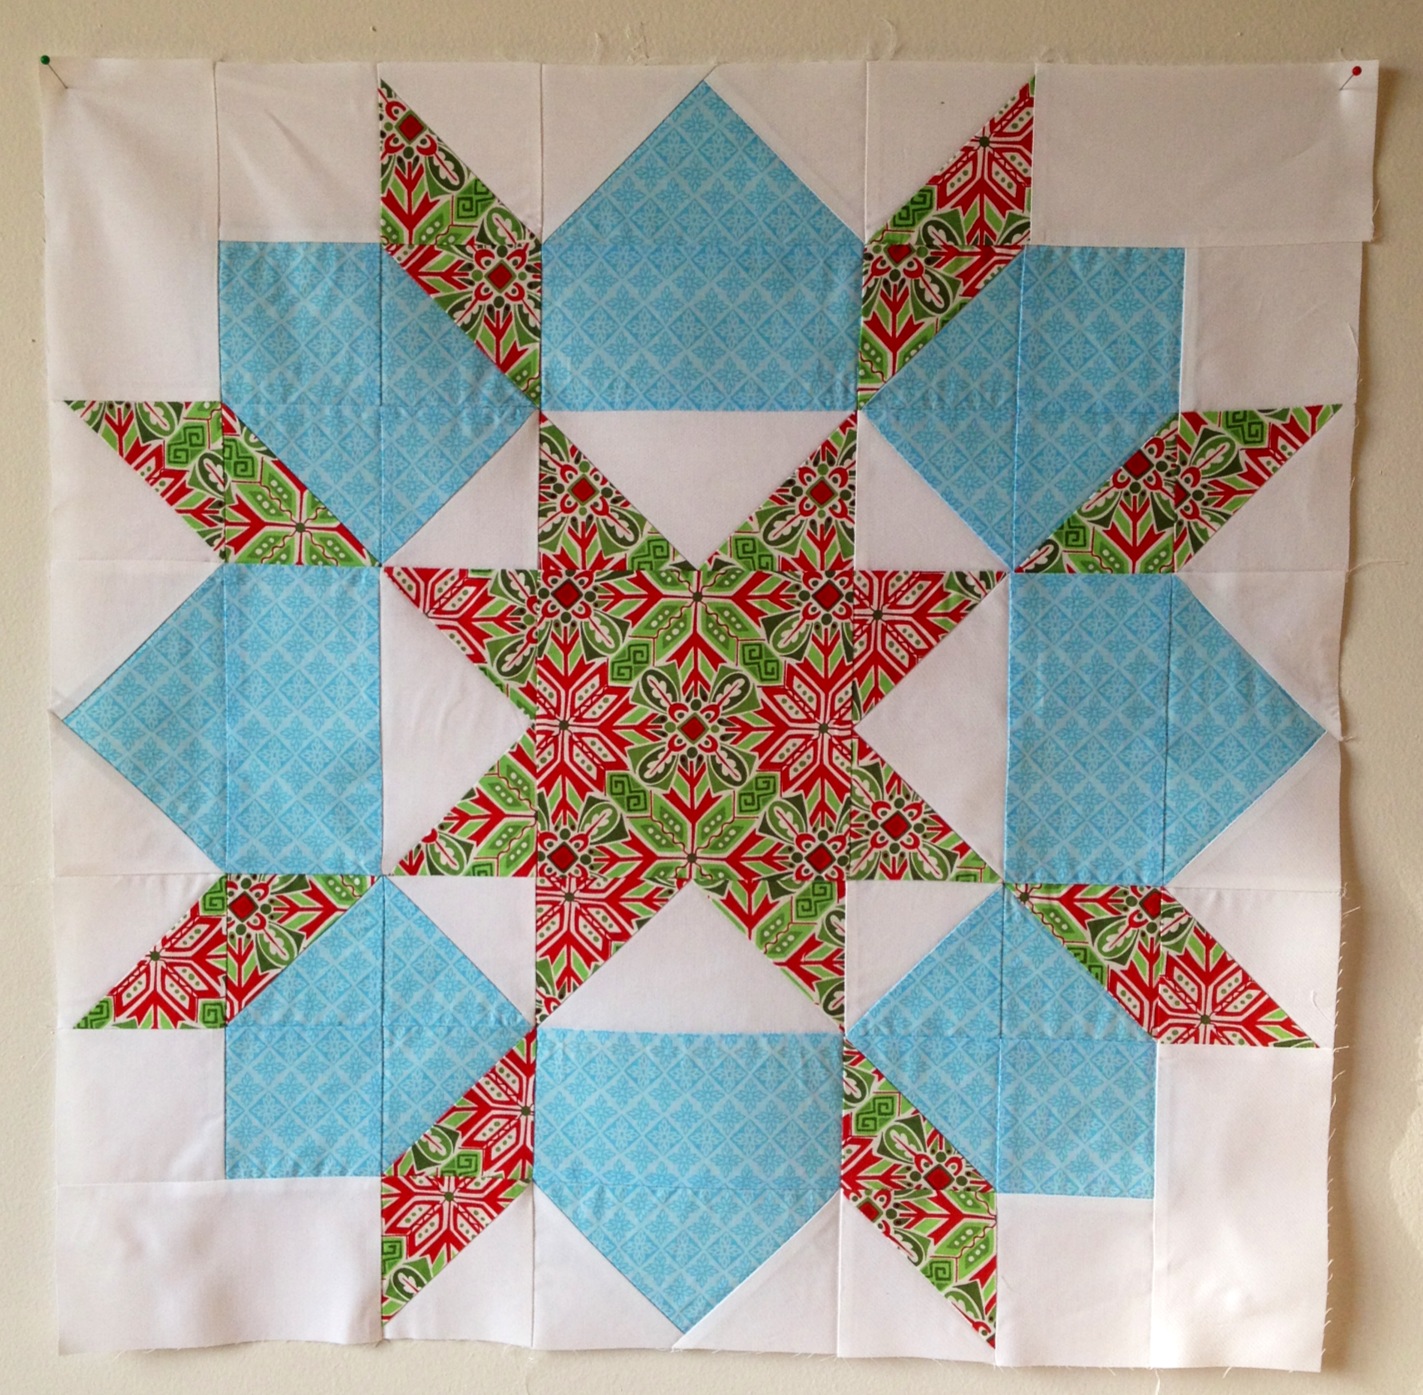
Last week, the pressing and cutting began for Block 1 and yesterday evening, I finished it up!  It's the most perfect block I've ever made - all my points are sharp (as sharp as they're getting for me).  The only thing that's a little sloppy is that the edges didn't exactly match up, as you can see.  I never take time to square things up as I go, that's probably why.  That and pieces probably stretch when I press them.  I know I do it wrong all the time!

Flurry Swoon Quilt Block
Swoon Block 1

As I began cutting my two fat quarters for Block 2, I realized I was going to have a problem.  I'm using this diamond print where the red is in the above block.  It's a more directional print than you realize at first.  The way the cutting instructions are, this is going to present a challenge.  Today's free time will be spent combing the Swoon Along for information on how others dealt with this.  If you have any tips, please save me some time and share them with me :)  I only have FQs to work with, so that makes it a little more difficult. 

Needless to say, Christmas Ribbons has been sitting idle for a week or so...  I'm so excited about Swoon though!  But I should buckle down and finish up Christmas Ribbons - Swoon might not even be finished by Christmas.  Plus I have two other quilts to baste and quilt that are just sitting around.  UFOs just aren't as fun as starting up a new project.

Linking up at Plum and June - click the gray button on the sidebar to check out the other great projects this week!

-Melissa

Monday, November 5, 2012

Christmas Quilting!

It's hard to believe that Christmas is almost here (yeah, I know we still have another major holiday between now and then, but I don't have time to hold my Christmas sewing off until after Thanksgiving).  There's less than 50 days to go.  And unless you're lucky, you won't be sewing on all 50 of those days!

I told you about my Christmas Ribbons quilt a while back.  It's now all pieced and basted.  I even got a little bit of quilting in last night!

Christmas Ribbons on my floor at about midnight on Friday - completed top!
I used the same white/poinsettia print on the back as I did for the border.  There's a strip of the other black poinsettia print down the back and that will be used for the binding, too.  Right now I'm quilting all of the big "diamonds" that I made with the colors - just stitch in the ditch around them.  And then I thin I'll go in and do the inside diamonds and then maybe do some kind of design in the center?  I'm not sure, and I'm still open to suggestions!

Have you ever had the needle come out while you are sewing? It doesn't break, the needle holder-inner thing isn't loose, the needle just rips right out of the machine and the thread stays intact and you have to loosen the needle thingy and put it back in?  That keeps happening while I'm quilting this thing!  Anyone have any ideas?  I think I read once that there's a front and back to batting and that can cause problems.  Could that be my problem?  Help is appreciated :)

I've also been doing a little retail therapy (we haven't seen the sun in Pittsburgh since before the hurricane - the hurricane was just annoying for us, no major damage, but it's been rainy or at least cloudy ever since... spending money on fabric is my way of adding sunshine to my life? maybe?) and I just ordered a FQ bundle of Bella and also 50 fat eighths from Lizzy House.  The fat eights won't ship until December 1...  it's going to be tough to wait it out!  The Bella FQs are in the mail today!  Now to figure out how to use them...

UPDATE: Linking up to WIP Wednesday at Freshly Pieced! Be sure to take a look at all the other great WIPs this week!  Oh and I started cutting into my stash of Flurry last night for a Swoon quilt!

-Melissa

Wednesday, October 24, 2012

WIP - Christmas Ribbons

Now that the pebble quilting is wrapped up and the Weekender bag is finnnnnallllllyyyy finished, I am back to piecing a quilt using Kona Ash and Basic Grey's Jovial (it's been in my stash for a year). I'm using the Christmas Ribbons pattern from Scrap Basket Surprises by Kim Brackett.

Christmas Ribbons - Rows 1-4
I must've miscounted when I was cutting because I seem to be short by a few units! No worries, there were a few unused strips and there's plenty of ash around! I laid out the first few rows to see how it would come together.
Digital Christmas Ribbons!
And I used my amateur photoshop skills in conjunction with my master AutoCAD skills to make a cute little grid pattern to follow while piecing!


For the rest of the week, I will be attending a conference in Hershey, PA! It's times like these when I wish I wasn't a chocolate snob. Oh well, not pigging out on chocolate is good for the waistline :) The Weekender bag is packed with my Groove quilt and some other things - hopefully I get some quiet time to finish up the binding!

Thanks for stopping by and don't forget to check out all the other great WIPs over at Freshly Pieced!

-Melissa

Sunday, October 21, 2012

Weekender Weekend Finish!

After two years of sitting in my closet with only the front and back panels put together, the Weekender bag is finally finished!  When the pattern says to be patient, it's no joke!  Precise cutting would probably have made this much easier - I tend to think things are close enough...apparently not in this case.  It would also help if I had a different zipper foot.  Or maybe I just don't know how to use my zipper foot properly (this is totally possible, I never do anything with zippers!).

Anyhow, here are a few pictures of the finished bag.  It really wasn't that bad, it just takes a lot of patience :) Maybe someday I'll attempt it again with other fabric :)

Front view

Lining - I feel like this could look nicer, but nobody will see it!
Next time, I'd add some pockets too!

Side view - those little side pockets are super cute!
They kinda hide the crappy sewing near the zipper pull :)
I'm off to rest - feeling pretty lousy due to self-diagnosed sinusitis.  If this isn't better tomorrow, it's off to to the doctor!  There's so much I want to sew but all I can do is lay here and thing about getting up and doing something!  It's the worst!

-Melissa


Thursday, October 18, 2012

Zippergate

As I mentioned yesterday, I decided to get the ol' Weekender bag back out.  I stopped when I got to the zipper.  I wanted a double-pull zipper, but it's impossible to find a double-pull purse zipper that's 30" long.  You can only get parka zippers (think of them as the opposite of the purse zipper).  Purse zipper - pulls together, bag closed.  Parka zipper - pulls together, coat open. 

I spent my lunch buying zippers at Joann.  I got a Coats & Clark plastic parka zipper.  They are separating zippers, so the pulls are "stuck" on the zipper part.  I had to cut the end teeth off to get the pull off. 

Step 1 - Cut the teeth from both ends of the zipper.
Step 2 - Move both pulls to near the ends of the zipper (zipper should be closed).
Step 3 - Completely remove ONE pull (zipper should still be closed).
Step 4 - Reverse the direction of the pull.
Step 5 - Put the removed pull on the end of the zipper with the existing pull.

Voila!  A purse zipper from a parka zipper!  I think this will be ideal for the Weekender - all the purse zippers at Joann were a little flimsy and none were 30" long as required per the pattern.

My only complaint is that the zipper seems a little chinsy and the pulls are both different!  One is nice and rounded, the other is small and rectangular.  Oh well.  The zipper isn't the focal point of the bag so I'm just going to deal with it!

Oh and I bought a 36" zipper because I wasn't sure how much I'd end up cutting off or how much extra that 30" included.  I will let you know how much I need to chop off when I try to install it!  Hopefully that will happen this weekend at some point. 

Let me know if you have any other great zipper ideas for the Weekender bag!

-Melissa

Wednesday, October 17, 2012

WIP Wednesday

I've been busy lately!  I started taking fiddle lessons (I've never played an instrument in my life) and I've been practicing every day - that's taken up quite a bit of my usual sewing time.  But I am still chugging along on some projects!

I finished up two quilts in the past week - Birds of a Feather and my Hometown quilt.

One of the purple chevrons in Birds of a Feather

Birds of a Feather - binding on and fresh out of the dryer!

Hometown - it's too heavy for my make-shift clothesline

Pittsburgh!! <3

This quilt is for someone who just happened to live in Meeker for a while.
This block was just a happy accident!

The back of my Hometown quilt

Look at alllllllllllllllll that pebble quilting!  Too bad I didn't keep track of the hours...

Jessica Kelly at SewCraftyJess posted about her patchwork Weekender bag.  I started a weekender bag two years ago!  I managed to get the front and back panels together, complete with pockets.  I put it away before I put the piping on the front/back.  And I still haven't found a zipper.  I want to do a two-way zipper.  Does anyone know if the following will work?  1. Buy a jacket zipper.  2. "Close" the zipper (put one pull at each end).  3. Remove one pull.  4. Reverse the removed pull's direction and put it next to the pull that's still on the zipper.  Will that make it so that a jacket zipper opens like a suitcase zipper?  As you can tell, I'm very inexperienced with zippers!  The goal is to finish this bag up in the next month or so.  We'll see how many more years it takes :) 

The Weekender after 2 years in a closet (plus some piping added yesterday!)

The Christmas Ribbons quilt is coming along - still doing the first round of piecing.  Hopefully I'll have some completed blocks soon!  It's too late now, but I'm kind of wishing I'd used a cream-colored solid instead of Kona Ash... oh well.

Christmas Ribbons...in piles

Parking Lights and the batik Garden Trellis (I don't think I ever posted about that one - it's a top I made that I got sick of and stuffed in a drawer) need to be basted and quilted!

Groove is still coming along - it's time for hand-sewing the binding!  I totally crapped out on the quilting - it's just stitch in the ditch.  At that point, I was just in a hurry to get something checked off my list.  Now that I've got the other two done, I kind of wish I'd done something more with this one!

Groove with those awesome clips on one side

Pieced back

Halloween is coming up!  I'm putting together a Medusa costume.  I bought a box of four dozen small snakes from Oriental Trading Co, got some snake jewelry at Macy's on clearance, got a Greek-looking black dress on clearance at Macy's, and I'm putting a sash together with some iridescent fabric from Joann.  Photos to come... 

Oh and now that the Hometown quilt is finished, I will have to finish the tutorial for it!

Back to fiddling around!  Thanks for stopping by and don't forget to check out all the great WIPs over at Freshly Pieced!

-Melissa

Thursday, September 27, 2012

Starchy Experiments

Best Press - my favorite!
A couple months ago I was reading a blog and the author was discussing how she likes to starch everything all the time.  I'd never starched a thing in my life.  Well except when I was attempting applique - I really am not a big fan of raw edges, so I tried the whole starching and pressing with a little tiny iron to have a nice finished edge on applique pieces.  Needless to say, there hasn't been much applique in my life following THAT experience.  My fingers ended up starchy and blistery.  I used Niagara non-aerosol spray starch.  It just left crustiness everywhere and tended to scorch a bit.  

In the spring, I was lucky enough to win a giveaway and a really heavy mystery box arrived in the mail.  It was an iron and a bottle of Mary Ellen's Best Press!  I used most of that bottle starching the hell out of my Birds of a Feather quilt top and backing.  It made spray basting much easier - wrestling with the wrinkles as you're gluing everything together is a pain.  After starching, there are no wrinkles to speak of!  And it made quilting nice, things seemed to just lay flatter in general.  And so my love of starching was born.
 

Niagara Non-Aerosol Spray Starch
That old bottle of Niagara spray starch was still sitting around.  So I started using it when I ran out of Best Press.  At the time, I was working on a quilt that was mostly dark colors.  The Niagara spray flaked terribly and left my iron crusty.  It did the job, and I am assuming it will wash out (that quilt is still just a top folded up waiting to be finished), but it looks a little gross in the mean time.

Mid-quilt, I switched from Niagara to Faultless Premium Starch (I went to Target at 8:50 pm and that's all that was left!).  It worked pretty well and didn't flake.  The aerosol did get to me though.  And I'm a fan of unscented things - the fresh scent of the starch was sort of nauseating.  But it did the job.

Faultless Premium Starch
When that ran out, I found Faultless Heavy Starch (try going to the store at a more normal time and there are more things in stock on the shelves!) - the scent is much more pleasant and the fabric is so much more crisp than with the Premium Starch!

As far as economy goes, the aerosol seems to give the best bang for your buck.  Does anyone know where to get mass quantities of Best Press in stores?  I've found gallon jugs online but shipping so much liquid comes at an outrageous price.  I've checked the local JoAnn Stores, hoping to use a coupon, but haven't found it in-store anywhere, only online.

So, in conclusion, I found Best Press to be best (but pricey), followed by Faultless Heavy Starch in second place, Faultless Premium Starch in third, and Niagara non-aerosol spray bringing up the rear. 

Faultless Heavy Starch
I read somewhere that vodka and distilled water are a homemade version of Best Press.  Has anyone tried this?  I don't keep cheap vodka on hand and I don't want to waste my good small-batch vodka (spent a little time...and  money...at the Smooth Ambler distillery this past weekend) in an experiment! 

Has anyone tried making their own spray starch?  If you've got an awesome recipe that you love, I'd love to hear about it!

So what else have I been doing for the past...month?  I'm almost finished with the Birds of a Feather quilt!  The Groove quilt is quilted (I half-assed it and just did stitch in the ditch), all that's left is to hand-sew the binding!   Christmas Ribbons is coming along nicely.  And for the last week or so, I've been back on the Pebble Quilting train - it's painfully slow.  But the quilt is probably about 50% quilted!  Hopefully by Monday I will have it about 75% done!  More updates soon :)

Melissa